

So many designers nowadays use Figma to prototype designs – it’s an incredible tool that has rapidly become an industry staple since its inception in 2016. 🔥
But is Figma compatible with building projects on Webflow? Can you actually convert your Figma designs into Webflow sites?
If you’re used to designing in Figma and want to leverage Webflow’s super-powerful features as a no code platform, read on! We’ll tell you everything you need to know about transferring your Figma designs to Webflow ⬇️
Can You Convert Figma Design to Webflow?
First things first – let’s figure out whether you can actually convert Figma to Webflow. 🤔
Are Webflow and Figma interconnected?
No, Figma and Webflow are not inherently interconnected platforms. But you can definitely use them together to design and then build incredible sites.
So although Webflow and Figma aren’t interconnected per se, you can export design assets from Figma which you can then use in Webflow.
In fact, most designers who work in Webflow find this way of combining Figma and Webflow together highly effective in executing projects. 🙌
Should you design in Figma before Webflow?
Yep, we would 100% recommend designing and prototyping in Figma before Webflow. This is why:
- It’s way more flexible. Figma will give you a really flexible environment for creating and iterating on design concepts without worrying about the actual site mechanics.
- It’s way more efficient. You’ll be able to quickly experiment with layouts, colors, and interactions in this initial stage of design.
- It’s easier to collaborate this way. Figma's collaborative features enable multiple team members to work together on the design, gather feedback, and iterate new changes quickly.
- It’ll help you be more consistent with your design. You might find it easier to establish design system components and be wholly consistent in elements like buttons, typography, and spacing throughout the project.
- You’ll still be able to facilitate development. Figma has features like design specs and code snippets so that you can still make sure your design gets implemented correctly.
- You can save a lot of time (and money). Designing in Figma before Webflow means you’ll be addressing design issues and iterating before going into development, which can save you so much time and money.
Now you know why most Webflow agencies will design in Figma and then once the design is approved, move to Webflow for development. ⚙️
The 2 methods of converting Figma and Webflow
So you can design in Figma and then convert to Webflow, but how do you actually do that?
The bottom line is that there are two ways of converting a Figma design to Webflow. Let’s explore. 🔍
Manually converting Figma to Webflow
➡️ The first method of exporting a Figma project to Webflow is manually converting it.
This means designing assets in Figma in a development-friendly way (we’ll touch on this later) and then creating a Webflow project, and replicating your Figma design.
Using the Figma to Webflow plugin
➡️ The second way of converting Figma to Webflow you can go for is by using the Figma to Webflow plugin.
The Figma to Webflow plugin simplifies the conversion process of Figma designs into Webflow websites. It will help you format your Figma elements into Webflow-friendly designs which you can then easily export into HTML and CSS code
Still got no idea how to convert Figma to Webflow? We’ve got you covered. 👇
How to Convert Figma to Webflow: The 2 Methods Step by Step
Step by step: Manually converting Figma to Webflow
Although manually converting your Figma project to Webflow looks complicated, it actually is quite straightforward once you break down the steps and understand why it all makes sense.
Let’s go through each of these steps one by one. ⬇️
Step 1: Create your assets in Figma
This is the easy step. Before converting anything, you’ll obviously need to have created all your website assets in Figma. We recommend creating the bulk of your design and paying attention to your design systems as a whole.
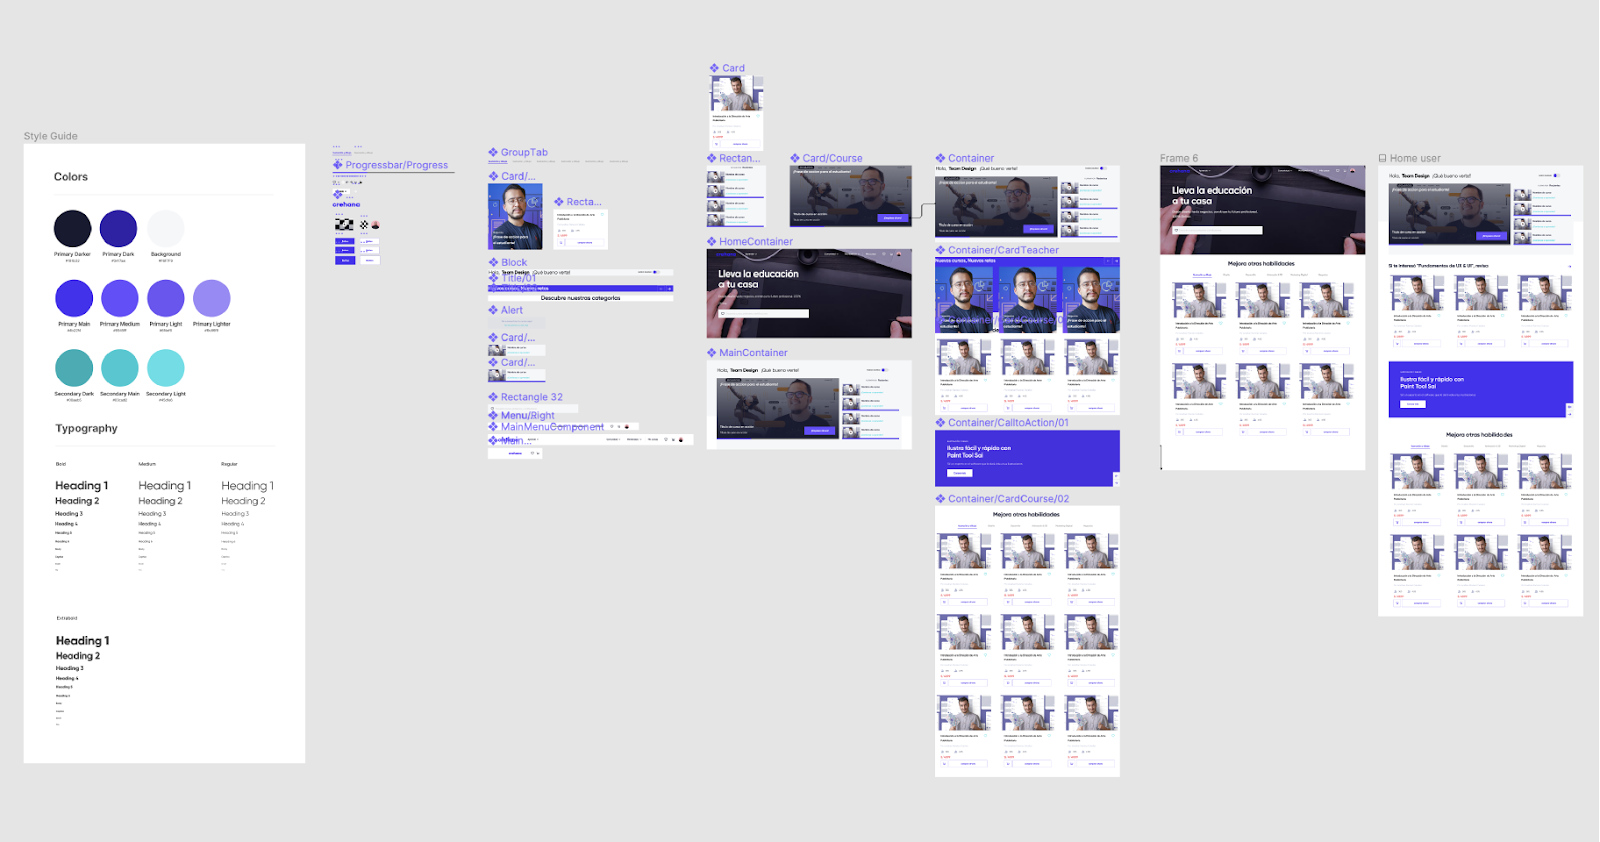
This means creating cohesive assets including:
- Full layouts for each page of your site
- Typography styles for headings, subheadings, paragraphs, and other text elements
- Text styles that include font family, size, line height, and letter spacing
- Color palette with hex or RGBA values for backgrounds, text, buttons, and other elements
- High-resolution images for backgrounds, hero banners, and content sections
- Logos and icons in various sizes and formats
- Icons or icon sets used throughout the site
- Buttons with different states (normal, hover, active, etc.)
- Form elements like input fields, checkboxes, and radio buttons
- Navigation bar designs with menu items and dropdowns
- Mobile menu designs for responsive navigation
- Form designs, including input fields, labels, and buttons
- Error and success state designs for form validation
- Infographics, charts, or diagrams if your site includes data visualization
- UI components like sliders, tabs, accordions, and modals – don’t forget to include various states for these components too
- Storyboards or frames demonstrating animations and interactions
- Figma prototypes for demonstrating user interactions and flows
- Wireframes or flowcharts for site navigation and user journeys
- Adjusted versions of assets for various screen sizes and orientation
💡Quick tip: Make sure your icons are in vector format (SVG) for optimal scalability.
It’s important to remember that you will be able to continue designing in Webflow, so if all your boxes aren’t ticked, don’t stress it! Webflow is also an awesome platform for collaboration and easy iteration.
Step 2: Create your Webflow project
Next step – create your Webflow project. Similarly to creating a Webflow project, you’ll just have to click the little “New site” button on your Webflow workspace homepage.

💡 A quick tip here is to keep things neat and tidy and create a new folder for your project (the folder icon on the left of “New site”) so that you can store all your site’s assets in one place!
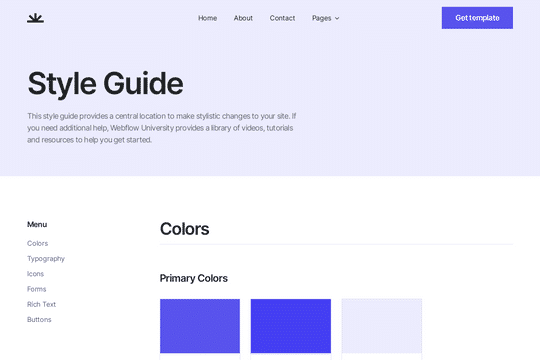
Step 3: Define a style guide on Webflow and add custom colors
Once you’ve created your Webflow project, it’s really important to define a style guide before you do anything else. Your style guide encompasses all your site’s fundamental design elements such as headings, spacing, link styles, colors, fonts, and paragraph formats.
Setting up global styles will allow you to avoid the repetitive task of modifying individual pages or sections down the line. It also means that your website will look cohesive across all pages.
➡️ To do this, use the following steps:
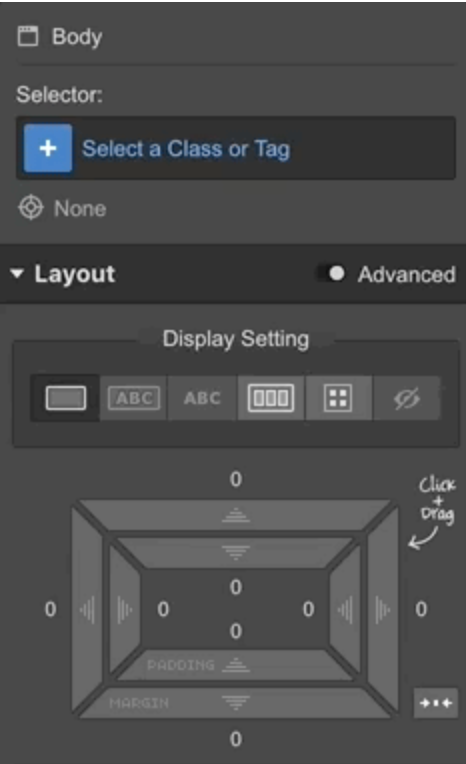
- On the Webflow canvas, select the element you want to style
- Click the class selector field in the top right corner of the screen
- Look for a purple-ish option with "All" in the tag name, like "Body (All Pages)" or "All H3 Headings”
- If the element can be defined globally, select the purple "All" option from the tag name dropdown
- Consider defining the base font style on "Body (All Pages)." This will save time and make font changes easier in the future!
- If you're using custom fonts not in the default list, access project settings. For Google Fonts, select your font from the list. For non-Google Fonts, upload TTF or OTF files and choose the desired weights
- Define all custom colors used in your design
- Create color-block divs and change their colors to match your swatches
- Ensure colors are marked as "Global" by clicking the "Global" checkbox in the lower-right corner of each swatch
Obviously, you’ll be constantly referring back to your Figma design when defining your Webflow style guide. That’s why thoroughly detailing all these design options in your Figma project comes in handy and saves you a lot of time at this step. 👍
💡 Quick tip: To improve site performance and reduce page load times, choose only the necessary font weights!
Step 4: Export your Figma assets to Webflow

The next step is to actually export all of your pre-designed Figma assets to your Webflow project. ⬇️
- Pick all the Figma assets you want to export by selecting them and checking the "Export" checkbox in the right-hand panel. Figma will prompt you to choose a location to save these assets on your computer.
👉 To export all assets, hit the shortcut Command/Control + Shift + E with nothing selected in Figma. This will open the export dialogue. If you want to export specific assets, such as those within a particular parent frame, select that frame in Figma before using the same shortcut (Command/Control + Shift + E).
- Organize your layer names– use forward slashes (/) in your layer names to indicate subfolders. For example, instead of "icon-back," name your layer "icon/back”. Figma will automatically create subfolders based on these names when you export
- Locate the folder where you saved your exported assets
- You then have two options in Webflow to transfer assets:
- Drag and drop the assets directly into Webflow from your file folder
- Open the "Assets" panel in Webflow, click the "Upload" button, and select the assets from your computer
💡 Quick tip: If there are a lot of images in your Figma design, it might be a good idea to use an image compression tool like TinyPNG to compress your images and hugely improve your future site’s performance!
Step 5: Convert your Frames and Groups into Divs
You’ve now successfully put your Figma design into your Webflow project – congrats, but you’re not done yet!
You’re now going to need to convert your Figma frames and groups into Divs.
In Webflow, a "div" is a fundamental HTML element that is used for creating and structuring the layout of web pages. The term "div" is short for "division," and it is a container element that allows you to group and organize content on a webpage.
You don’t have to add divs, but we find they’re super helpful in keeping you organized all the way through.
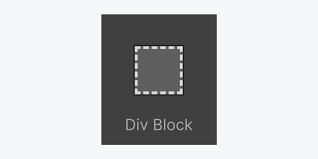
- In the Webflow Designer, you can add divs to your canvas by selecting the "Div Block" element from the elements panel on the left
- Click and drag the "Div Block" element onto your canvas where you want to create a div
- After adding divs to your canvas, give each div a unique class name to help you style and target them later. Click on the div to select it, and in the right-hand panel, you'll see the "Class" field. Enter a descriptive class name for each div (e.g., "section-one," "header," "footer")
- While you don't need to define the classes' styles at this point, you can give each div an ID for reference and potential use in anchor links. To do this, click on the div to select it, go to the "Settings" tab in the right-hand panel, and enter an ID for the div (e.g., "section-1," "top-header")
- If you want to create a grid layout on your site, you can use the grid element or set your div's display property to "grid." This allows you to create complex grid-based structures for your content
📚 By the way, Webflow University has a great resource on Divs if you need help getting your head around them!
Step 6: Style your content
Next step – styling your content.
Content styling in Webflow refers to the process of defining the visual appearance and layout of the content elements on your site’s pages. This includes aspects like typography, colors, spacing, positioning, and other design-related properties.
Styling your content in Webflow is super intuitive but can get a little messy down the line when your site gets larger. Hopefully these steps will help you keep things clean ⬇️
- Instead of naming elements very specifically, create combo classes in Webflow. For example, instead of "Black Hero Text," create a combo class like "All H1 Headings" + "Black Text." This way, you can manage common styling properties like size, weight, and positioning within the "All H1 Headings" class, while the "Black Text" class handles color changes or other specific properties
- Use combo classes to keep your styling organized and efficient. Assign properties that are common across multiple elements to the base class, and then create combo classes for variations as needed
- Achieving pixel-perfect matching between Figma and Webflow may not always be feasible or practical – elements in code behave differently than they do in design tools like Figma. Evaluate your Figma design and be open to making layout adjustments that facilitate easier implementation in Webflow
Bottom line here is that it’s pretty much impossible to perfectly match what you designed in Figma to what you’re building in Webflow.
That’s why earlier on we explained that you can’t convert a Figma design to Webflow. You can apply your Figma design to your Webflow project but it will never be exactly the same.
Step 7: Create your interactions
It’s many designers' opinion that Webflow is the best tool on the market when it comes to creating incredible interactions. Here’s how to do it ⬇️
- Identify the element on your webpage that you want to apply an interaction to. Click on the element to select it
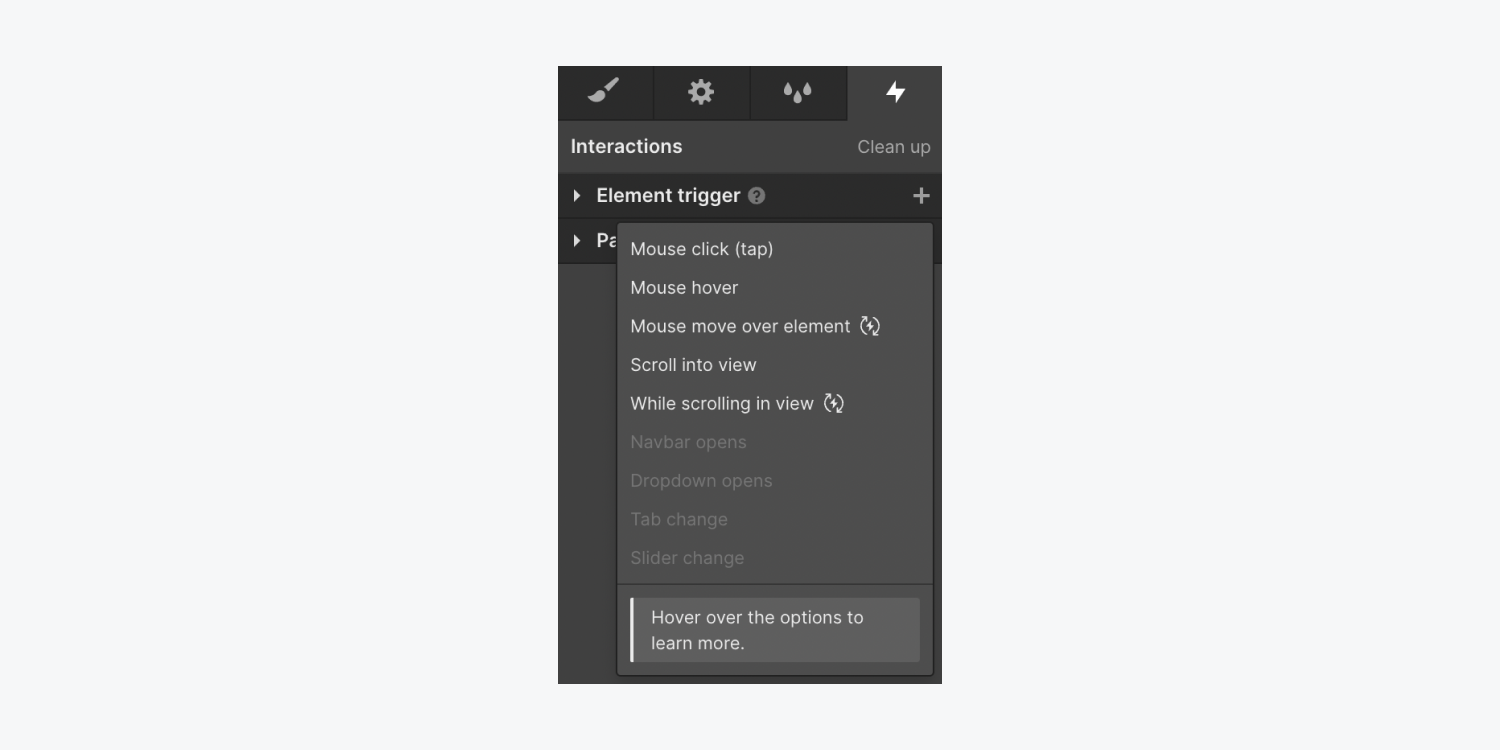
- In the right-hand panel, click on the "Interactions" tab to open the Interactions panel
- Decide what triggers your interaction. Webflow offers various triggers like "Hover," "Click," "Mouse Tap," and more. Select the trigger that suits your design
- Configure the actions that should occur when the trigger is activated. You can add multiple actions to create complex interactions
- Specify the elements that the interaction should affect. You can select specific elements on the canvas or use class-based targeting to affect multiple elements with the same class
- Adjust the timing and easing options to control the speed and smoothness of the interaction. You can set durations, delays, and choose from various easing curves
- Webflow also allows you to define interaction states, such as "Mouse Hover," "Mouse Click," and "Mouse Tap." You can customize how elements appear and behave in each state
- Click the "Preview" button in the Interactions panel to test your interaction in the Webflow Designer. This allows you to see how it behaves before publishing your site
- After you've configured your interaction, click "Save" to save the interaction settings
You’ll need to publish your Webflow site if you want to preview the interactions you just created – you obviously don’t need to make the site public yet though. 👍
Step 8: Publish and iterate
Publishing your Webflow project is the final step to making your site live. This one’s an exciting and straightforward step! 👏
- Ensure that your website design is complete and that all content and interactions are in place. Use the Webflow Designer to review and make any necessary adjustments
- The Webflow Designer provides an accurate representation of your site but it's good practice to preview your site one last time to ensure everything looks as expected
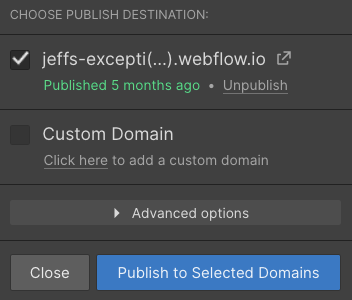
- Click the "Publish" button in the upper-right corner of the Webflow Designer. This action will publish your website to a Webflow subdomain by default, making it accessible online
- Pay special attention to responsiveness. Ensure that your website adapts and looks good on different screen sizes and orientations. Address any layout issues that may arise during testing
- If you've used custom code or embeds on your site, verify that they are set up correctly, as they may not render inside the Webflow Designer. Test the functionality of any third-party integrations or scripts you've added
- If you have a custom domain, follow Webflow's instructions to connect it to your website. This step is essential if you want to use your own domain instead of the default Webflow subdomain
After publishing, it's crucial to test your website on various platforms to ensure its functionality and appearance are consistent. Consider testing it on:
- Your mobile device and other major mobile operating systems (iOS, Android)
- Different web browsers (Chrome, Firefox, Safari, Edge, etc.)
- Various screen sizes and resolutions by resizing your browser window
- Emulators like BrowserStack to replicate the experience on devices and viewports you don't have access to
💡 Remember that you’ll need to republish your site whenever you make a change.
Using the Figma to Webflow plugin

Now that we’ve covered exactly how to manually convert your Figma design to Webflow, let’s talk about the method of using the Figma to Webflow plugin. ⬇️
What is the Figma to Webflow plugin + how does it work?
The Figma to Webflow plugin was developed by Webflow Labs – it facilitates the conversion of static designs from Figma into production-ready HTML and CSS for Webflow websites.
This is how the Figma to Webflow plugin works:
- Designers install the Figma to Webflow plugin and authorize access to the specific Webflow sites or workspaces they intend to use for the design-to-development transition.
- In Figma, designers create their static web designs using features like auto layout, styling, typography, shadows, and more. They can design their layouts with responsiveness in mind.
- Using the plugin, designers can copy the Figma design elements they want to transfer to Webflow. This includes design components, layout structures, and styling.
- After copying from Figma, designers paste the elements into Webflow's visual design interface. The plugin translates Figma's design elements into responsive flexbox structures in Webflow.
- Once the Figma design is imported into Webflow, designers can enhance it with Webflow Interactions (IX2) to make elements interactive and dynamic.
Read on to find out exactly how to use the Figma to Webflow plugin, step by step 👇
How to set up the Figma to Webflow plugin
When used correctly, the Figma to Webflow plugin can be a really powerful shortcut that helps you avoid some of the steps in the manual method of converting Figma to Webflow. 👍
Before anything else: install the plugin
- Start by clicking on the "Account" dropdown located in the navigation bar of your Figma workspace
- From the dropdown menu, select "Workspaces" to access your workspace settings
- Within your workspace settings, locate and click on the "Integrations" tab. This is where you manage all integrations related to your workspace
- If you have multiple workspaces, select the specific workspace from which you want to remove the plugin under the section labeled "Approved Applications"
- In the list of approved applications, find the "Webflow from Figma to Site" application. Install this plugin
Step 1: Create a Webflow layout in Figma
- Start by opening your Figma design file
- In Figma, go to the "Community" tab on the left sidebar
- Search for "Figma to Webflow" and click on the plugin
- Click the "Install" button to add the plugin to your Figma workspace.
- Authorize the plugin to access your Figma account if prompted.
Step 2: Set up your grid and configure your layouts
- You can either create a new frame from scratch or select an existing frame where you want to set up the grid and layouts
- Within the frame, start by adding a grid or layout elements. These elements can include rectangles, frames, or text boxes that represent the sections of your layout
- Select the grid or layout elements you've added, and in the right-hand panel or toolbar, configure their settings. Set the width and height of elements, adjust spacing and margins between elements, and align elements to the grid or layout
- Arrange your content elements within the grid or layout according to your design. You can drag and drop elements to different cells or adjust their size and position.
- Style your elements by selecting them and using the right-hand panel or toolbar to set typography, colors, borders, and more
- If your design requires multiple grids or different layouts, repeat the process by adding new grid or layout elements as necessary
Step 3: Choose your class naming convention in Figma
Class naming conventions are super important in maintaining design consistency and facilitating the transition from design to development.
We’ve got a full in-depth guide to Webflow class naming conventions if you need help in choosing which convention to use! 🤝
- Decide on a naming structure that suits your project. For example, if using BEM, you might choose "block__element--modifier" format
- Create a document or style guide within Figma to document your chosen naming convention. This guide should include examples and explanations for you to reference as your project grows
- Consistently apply the chosen class naming convention to your Figma design elements. When creating or modifying elements, use the convention to name their classes
- Consider using hierarchical class names to represent the relationships between elements. For instance, if you have a button inside a navigation bar, the class might be "nav__button"
We wouldn’t recommend skimping on this step as it really is the only way to make sure you keep your project clean and organized! 👍
Step 4: Open your Webflow project and set up the style guide
Just like we talked about earlier, setting up your project’s style guide is an absolutely crucial step. You’ll still need to do this when using the plugin method ⬇️
- Log in to your Webflow account
- Select the specific project where you want to set up the style guide by clicking on its name or thumbnail
- In the selected project, click on the "Designer" button to access the Webflow Designer interface
- In the Webflow Designer, locate the "Style Manager" panel on the right-hand side. It typically looks like a paintbrush icon
- In the Style Manager, you can create and organize styles for various elements in your design. 👇
- To create a new style, click the "+ New Style" button.
- Select an element (e.g., a heading, button, or paragraph) in your design canvas.
- Click the "Create a class" button that appears when you select an element.
- Name the class and press "Create."
- With your class selected, use the style panel on the right to define various style properties, including typography, colors, margins, padding, borders, and more
- You can create combo classes to further refine and customize styles based on your base classes. For example, you can create a combo class for a button to define different color variations
💡 Quick tip: You can choose to document your style guide to detail your typography, color palettes, and usage guideline choices – this makes it a lot easier to communicate to future designers. Your future self will thank you!
Step 5: Add HTML tags to Figma
In Figma, you can't add actual HTML tags like you would in a web development environment. However, you can simulate HTML tag names by using text layers with specific naming conventions, then follow these steps ⬇️
- In Figma, select the text tool from the toolbar (T icon)
- Click on the canvas where you want to add your HTML tag
- Type the HTML tag name, enclosed in angle brackets, followed by your desired content. For example, if you want to simulate a heading tag, you can type <h1>Your Heading</h1>
- Format the text layer to match the styling you want for that specific HTML tag. Adjust font size, color, font weight, and other properties as needed
- To simulate other HTML tags, repeat the process by creating new text layers with the appropriate tag names and content
- Keep your "HTML tags" organized by naming your layers descriptively and grouping them if necessary
While this method doesn't add actual HTML functionality to your design in Figma, it helps convey your design intent and structure to developers who will eventually translate it into functional HTML and CSS during the web development process. 👍
Step 6: Migrate your components to Webflow
⏱️ It’s now time to go back to Figma. Follow these steps to efficiently migrate your Figma components to Webflow ⬇️
- In Figma, select the pre-designed components (e.g., frames, elements, buttons) you want to migrate to Webflow
- With the selected components in Figma, copy them to your clipboard
- Paste the copied Figma components into Webflow. The Figma to Webflow plugin will automatically convert these components into Webflow elements
- After pasting the components, review them in Webflow to ensure that styling and layout have been correctly transferred
Step 7: Publish and iterate
It’s finally time to publish your project! 🚀
- Use the preview mode in Webflow to see how your design looks and behaves. Test it on different devices and screen sizes to ensure responsiveness
- Based on your testing and feedback, make necessary adjustments and refinements to your design. This could include fine-tuning styles, fixing layout issues, or optimizing performance
- When you're satisfied with the design and ready to make it live, click the "Publish" button in Webflow. This will deploy your design changes to your live website
- Check your design is exactly as you expect it to be by checking your live URL
The only thing left to do now is to keep iterating changes according to feedback – don’t forget to republish all your changes. 👍
Takeaway
Figma and Webflow are design and development powerhouses – and together, they’re even more potent.
Hopefully, we’ve helped you figure out just how to use Figma and Webflow together to nail your web projects.
If you need more Webflow guidance, we’re always here to help! Check out the Hedrick blog to see all our resources and reach out if you want us to do the work for you 😇

Need help with your Figma to Webflow conversion? We can provide a quote right away with our Figma to Webflow Quote Generator. We've evaluated and scoped hundreds of Figma design files, and can quickly provide a quote for how much it would cost us to develop your designs in Webflow. Get in touch!
Related articles
Read more
Read more
Read more
Hire Hedrick, Your Webflow Sidekick
Whether it's developing new websites and landing pages, building complex animations, integrating apps, or adding some custom code – if it's related to your Webflow site, we can help!